Here are the steps to check tire pressure on Honda CRV:
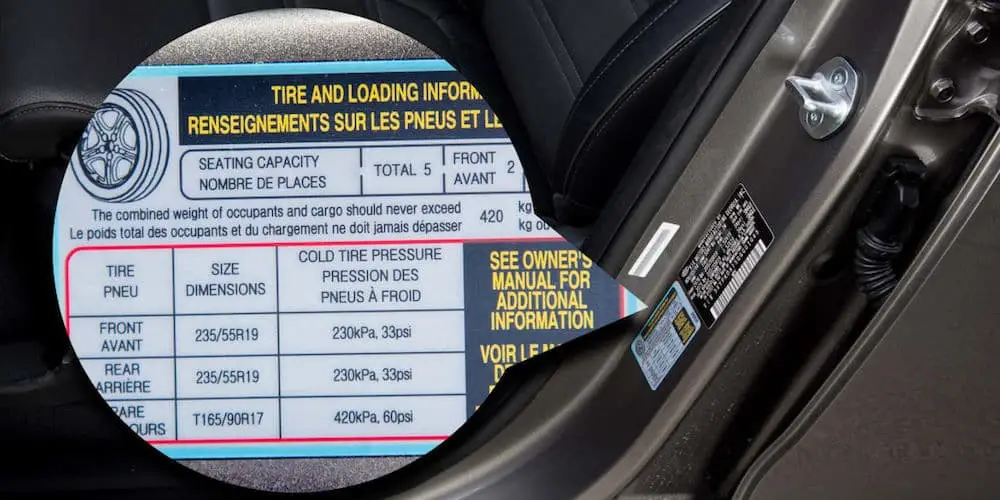
- First, find the door jamp of your Honda CRV.
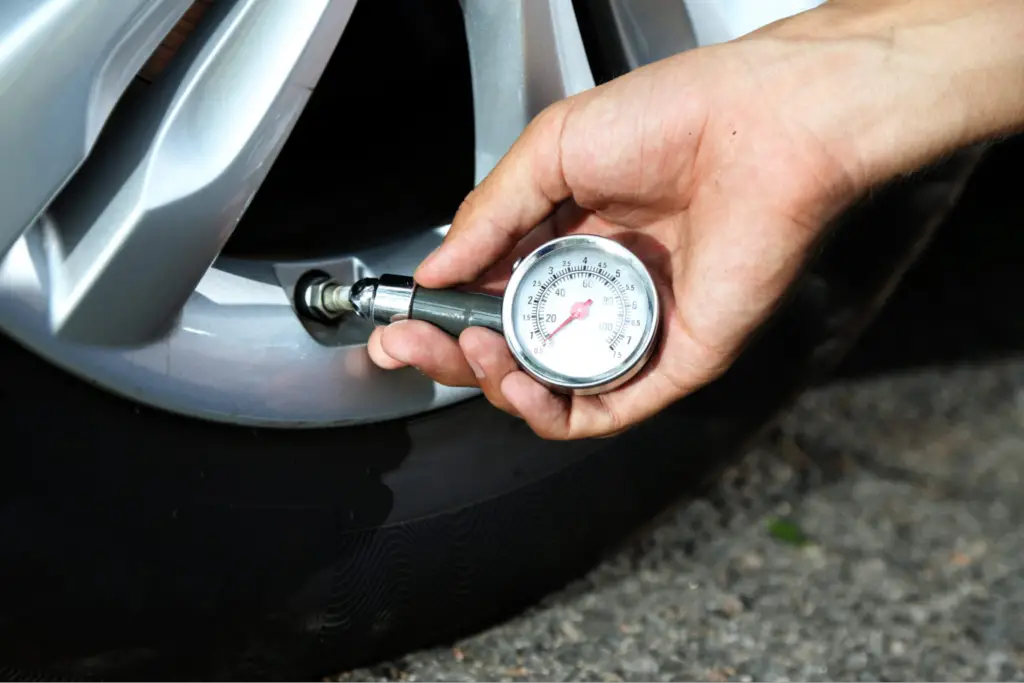
- Then, remove the cap and attach a tire pressure gauge firmly to the valve stem.
- After that, you should attach the tire gauge to the valve stem and check the PSI reading.
- Now, compare the reading to the recommended tire pressure and adjust if needed.
- Finally, screw the valve cap back securely.
This quick answer on how to check tire pressure on Honda CRV may not help you that much. So, hang tight to learn the detailed process.
Key Takeaways
- The recommended tire pressure of Honda CRV 2019-2023 is Front: 32 psi; Rear: 30 psi.
- To check tire pressure, remove each tire’s valve stem cap and insert a tire pressure gauge.
- Ensure that the tire pressure is checked at least once a month to ensure the optimal performance of the tire.
What Is the Recommended Tire Pressure on Honda CRV
A Honda CR-V’s optimal tire pressure may vary depending on the model year, tire size, and load conditions. Here are the recommended tire pressures:
- 2019-2023 Honda CR-V (most models): Front: 32 psi; Rear: 30 psi
- 2020 Honda CR-V: The optimal range is 35-40 PSI. 35 PSI for better fuel economy, 40 PSI for improved handling.
- 2022 Honda CR-V: Front: 32 psi; Rear: 30 psi
Remember, you can also find the tire pressure recommended on the door jamb on the driver’s side. Tire longevity and optimal handling depend on regular tire pressure checks.
How To Check Tire Pressure on Honda CRV: Step By Step
Process
In the absence of pressure information in the TPMS technology of your Honda CRV, you can resort to the traditional method. This traditional way of checking tire pressure on a Honda CRV might sound very ticky.
But the process is handy, esp when the Honda tire pressure light keeps coming on, similar to the blinking tire pressure light in Nissan.
Step 1: Find Your Door Jamb
First, you need to locate the manufacturer-recommended tire pressure for your specific Honda model. A label usually appears inside the driver’s side door jamb with this information. In this case, it’s 33 psi.

Step 2: Remove the Cap
The next thing, you need to do is to do is to unscrew the valve cap from the tire you want to check. It will allow you to access the valve stem.
The valve stem is the point where you can connect a tire pressure gauge to measure the air pressure inside the tire.
You can now directly access the tire’s air pressure with this step. That enables you to assess and adjust it as needed.
Step 3: Use a Tire Gauge
Now, take a tire pressure gauge and secure it firmly to the valve stem. Then, gently press the tire gauge against the valve stem, and you will discover the tire’s hidden secret – a pristine PSI reading indicating its vital pressure.

Step 4: Verify the Reading
At this point, the gauge will reveal the tire pressure for each tire. That allows you to compare it to the recommended level and adjust the air accordingly.
These versatile tire pressure gauges can be employed either in the comfort of your own home or at a gas station.
If the gauge displays the incorrect tire pressure for your vehicle, you need to adjust the tire pressure accordingly.
Step: 5: Reinstall the Valve Cap
Once you are done with the previous step, you need to screw the valve cap back onto the valve stem securely.
Remember one thing, you should repeat the above steps for each tire on your Honda vehicle. Also, if your vehicle has green valve caps, it indicates that it has received a nitro-fill service.
For a more detailed overview, watch the following video.
This service can enhance gas mileage and maintain consistent tire pressure. It also helps prevent the tire pressure warning light from illuminating. You can inquire about this service with your service advisor during your next visit.
How Often Should You Check the Tire Pressure?
It’s advisable to inspect the tire pressure of a Honda CR-V monthly. Also, it’s crucial to check it when there’s a substantial temperature shift or if you observe irregular tire wear.
Always make sure your vehicle’s tire pressure matches the recommended level. That is typically noted on the driver’s side door jamb label, which is essential.
Consistent monitoring and upkeep of tire pressure contribute to extended tire longevity and improved handling.
Frequently Asked Questions (FAQs):
Do You Know If Your Tires Are Properly Inflated?
To assess the right tire pressure, you need to simply press your thumb onto the tire’s surface. Underinflated tires will feel soft, while overinflated ones will be notably rigid. The correct tire pressure is achieved when the tire feels neither excessively soft nor excessively stiff, as indicated earlier.
Does the Honda CRV Have a Tire Pressure Display?
Yes, the Honda CRV features a Tire Pressure Monitoring System (TPMS), conveniently displaying real-time air pressure data for each tire on the instrument panel. When tire pressure drops significantly, the TPMS indicator illuminates, pinpointing the underinflated tire on the display. In such a scenario, it’s advisable to safely pull over and adjust the air pressure to the recommended level.
When Do You Need New Tires for Your Honda CR-V?
Honda CRV tires should be replaced every six years as a general rule. However, if you observe reduced tread depth or detect cracks and bulges in the tires, consider replacing them sooner for safety.
Conclusion
Hopefully, you got enlightened reading your concern about how to check tire pressure on a Honda CRV.
Ensuring the correct tire pressure on your Honda CRV is a straightforward yet crucial task. Maintaining optimal tire performance, improving safety, and extending tire life can be achieved by following these steps.
